A bare open-frame rack in the US typically costs in the low to mid hundreds of dollars. A fully enclosed 42U cabinet with basic accessories generally costs from around one to several thousand dollars depending on depth, material, and included features. Mid-range 42U setups typically cost around one to two thousand dollars, once you add basic installation. That’s the number most IT buyers anchor to when planning a single-rack deployment.
The catch: the rack frame is rarely the biggest line item. PDUs, a UPS, rails, cable management, and installation labor often push total project cost well above the enclosure price. Budget for the ecosystem, not just the enclosure.
Three things support these ranges: market price tables from guides showing consistent price bands, benchmarking data indicating installation costs vary by complexity, and distributor inventories reflecting a broad price spectrum for wall-mount units and enterprise enclosures.
Table of Contents
- How much does server rack cost vary by rack type?
- Concrete price examples by size and depth
- What total cost of ownership actually looks like
- How to estimate your total rack budget step by step
- New vs used server racks: when each one makes sense
- Delivery, installation, and lead times: the costs buyers miss
- Three sample budgets for real buying scenarios
- Practical tips to cut server rack costs without cutting corners
- Key Takeaways
- The part of rack budgeting most guides skip
- Commsbuyer: network cabinets with next-day stock and transparent pricing
- Useful sources for price checking and specification lookup
How much does server rack cost vary by rack type?
The rack type you choose sets the floor on your budget before a single accessory enters the picture. Here’s how the main categories break down.
Open-frame racks are the cheapest option. Two-post and four-post open-frame designs offer no side panels, no doors, and no security, which is exactly why they cost less. They’re the go-to for lab environments, telecom closets, and anywhere airflow matters more than physical access control.
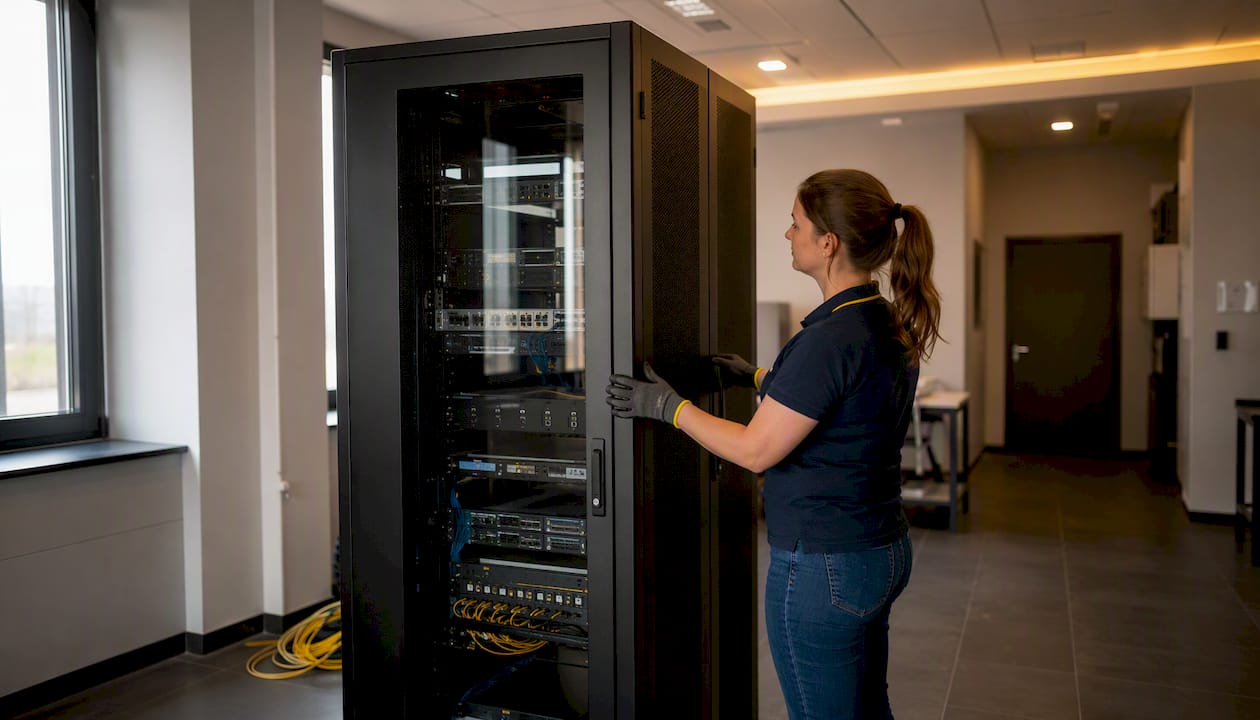
Enclosed cabinets add steel side panels, front and rear doors (vented, solid, or glass), and often integrated cable management. That material and fabrication cost shows up in the price. A basic enclosed unit typically starts in the mid hundreds of dollars; a deep, high-gauge steel cabinet with locking doors and a brushed finish may cost significantly more before accessories.
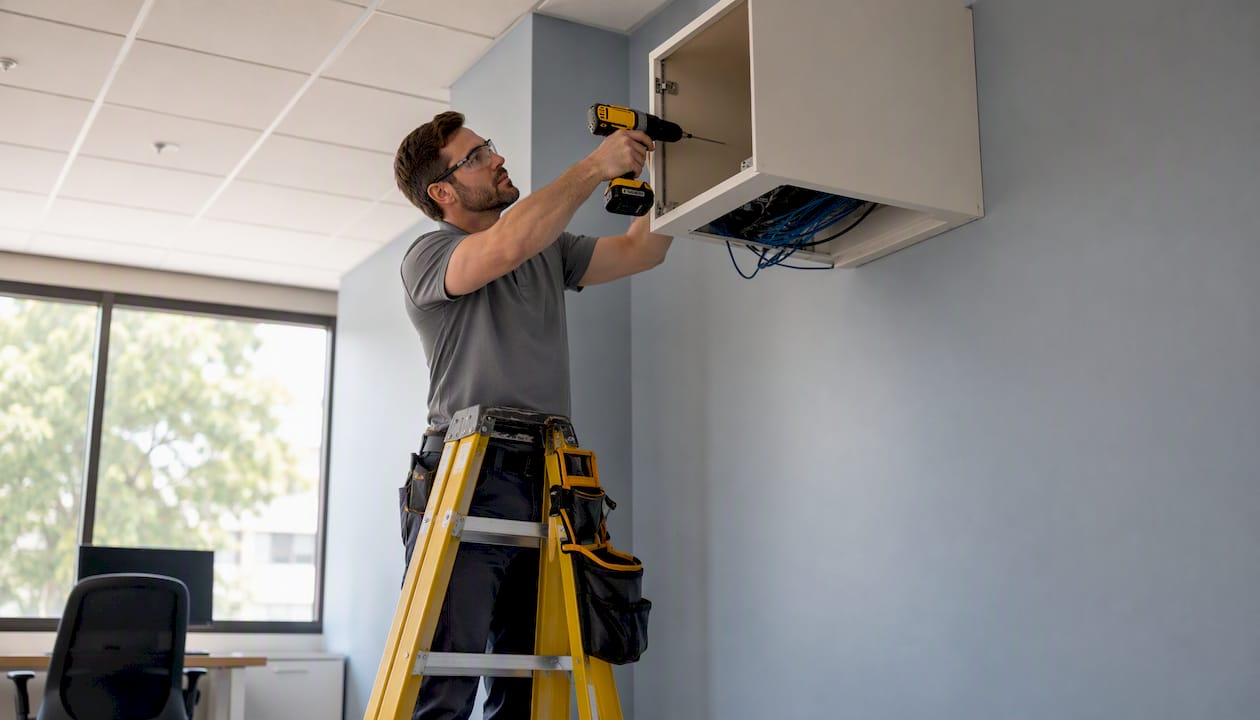
Wall-mount enclosures are a separate category. They’re compact, designed for shallow-depth networking gear, and sized for 6U–18U. Small wall-mount units generally start below a few hundred dollars, with deeper 12U models costing modestly more depending on features.
The features that push a rack from the low end to the high end: heavier-gauge steel (adds rigidity and weight capacity), greater depth (800mm or 1,000mm vs. a standard 600mm), tempered glass or perforated steel doors, factory-applied powder-coat finishes, and integrated cable management channels. Material choice and enclosure features are the primary drivers of price differences across all rack categories.
| Rack Type | Typical U-Sizes | Low | Mid | High |
|---|---|---|---|---|
| Open-frame 2-post | 12U–42U | $80 | $200 | $500 |
| Open-frame 4-post | 24U–42U | $150 | $400 | $600 |
| Wall-mount enclosed | 6U–18U | $80 | $300 | $600 |
| Enclosed cabinet | 18U–42U | $300 | $900 | $2,000+ |
| Full 42U enclosed | 42U | $600 | $1,200 | $4,000 |
Vendors worth checking for US stock and published pricing include RackSolutions, APC (Schneider Electric), Tripp Lite / Eaton, and StarTech. Each covers different segments: RackSolutions for custom and standard enclosures, APC for integrated power and cooling ecosystems, Tripp Lite / Eaton for mid-market enclosed cabinets, and StarTech for budget-friendly open-frame and wall-mount options.
Concrete price examples by size and depth
U-height and depth together determine most of the price variation within a given rack type. A 42U rack at 600mm depth and one at 1,000mm depth can differ noticeably in price on the frame alone, as deeper units require more material and structural features.
Standard depth options in the US market typically include shallower depths suited to patch panels and switches, mid-range depths common for servers, and deeper options for specialized equipment; depths beyond common standards may incur premium pricing.
| Size | Depth | Type | Low | Mid | High |
|---|---|---|---|---|---|
| 12U | 600mm | Wall-mount enclosed | — | $200–$300 | $500 |
| 18U | 600mm | Wall-mount enclosed | $150–$200 | $300–$400 | $600 |
| 24U | 800mm | Enclosed cabinet | $300–$400 | $600 | $1,200 |
| 42U | 800mm | Enclosed cabinet | $600 | $1,200 | $2,000+ |
| 42U | 1,000mm | Enclosed cabinet | $900 | $1,400–$1,600 | $4,000 |
| 42U | 1,200mm | Enclosed cabinet | $1,100 | $2,000 | $4,000+ |
Wall-mount small units can start under $100; full 42U enclosed cabinets commonly list from a few hundred to $2,000+ depending on depth and features. The jump from mid to high in the 42U rows usually reflects premium steel gauge, integrated blanking panels, a higher static load rating (often 2,000 lbs vs. 1,500 lbs), and factory-tested door seals for dust control.
For most small office or SMB deployments, a 42U at 800mm depth in the $900–$1,400 range covers the frame without overpaying for features you won’t use.
What total cost of ownership actually looks like
The rack frame is the starting gun, not the finish line. Practitioners who’ve built out server rooms consistently find that accessories and services typically double or exceed the frame price, especially for production deployments. Here’s where that money goes.
- Sliding rails and mounting hardware: Most racks ship without rails. A compatible rail kit from the server manufacturer typically costs tens to a couple hundred dollars per server, leading to a considerable total for a multi-server rack. Rails, doors, and basic PDUs are commonly sold separately and add meaningful line items to initial quotes.
- Power distribution units (PDUs): A basic horizontal PDU with multiple outlets generally costs under a few hundred dollars. Metered or switched PDUs with remote monitoring cost more, and high-density 3-phase PDUs can be pricier.
- Uninterruptible power supply (UPS): A UPS sized for a single rack (5–10 kVA) typically runs $800–$3,000 depending on runtime and topology. Tower UPS units are cheaper; rack-mount doubles as a space saver but costs more per kVA.
- Cable management: Cable management accessories vary in cost and can add significantly to total expenses; fully cabled setups can be costly.
- Shelves and fan trays: Fixed shelves and fan trays for supplemental airflow add to costs and vary in price based on specifications. These are easy to overlook and easy to need.
- Blanking panels: Blanking panels are inexpensive but important for airflow management, and multiple are typically needed per rack.
- Monitoring and environmental sensors: Monitoring and environmental sensors vary in price depending on features and capacity.
- Extended warranties and support contracts: Manufacturer warranties on enclosed cabinets often cover a limited period, with extended coverage or support contracts available at additional cost.
Per-rack power and cooling hookups, monitoring, and recurring facility costs can be substantial and are often a significant part of total ownership costs in co-location or managed facilities.
Pro Tip: Before accepting any rack quote, ask the vendor to itemize what “rack price” includes. Specifically confirm: are rails included or separate? Is a PDU in the box? What’s the warranty period and does it cover on-site service? Missing these questions costs real money at delivery.
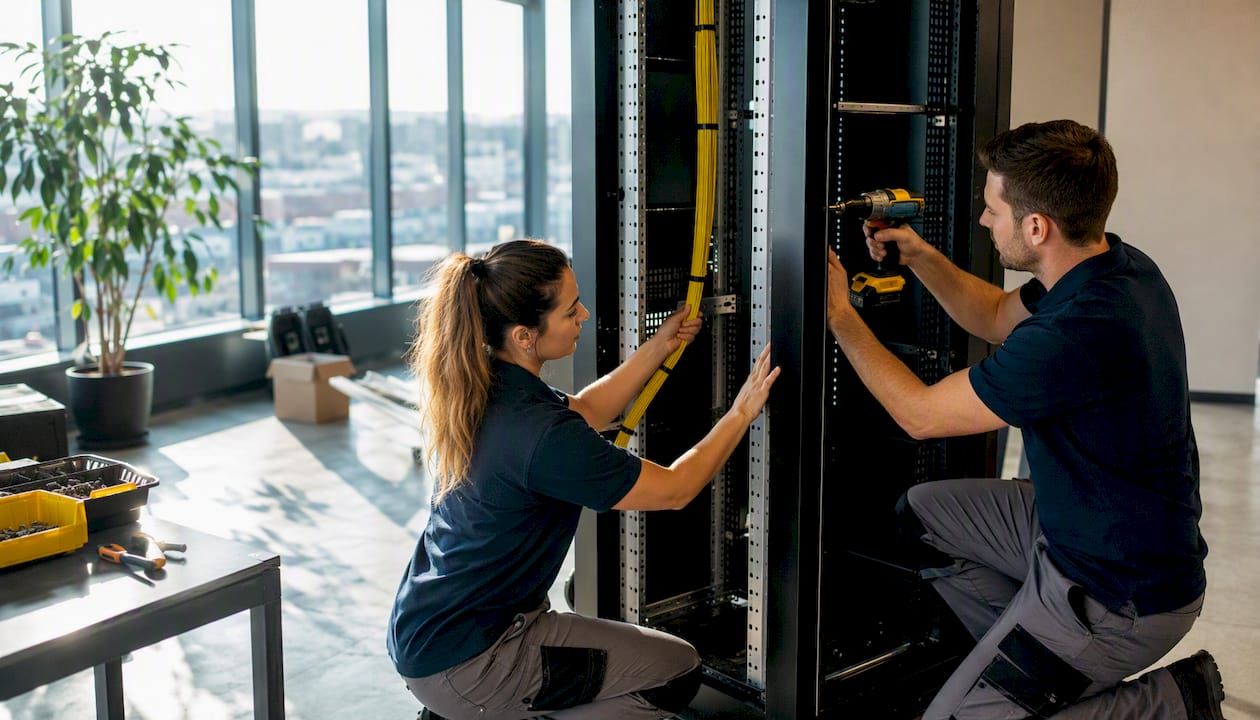
Small items that routinely get omitted from quotes: cage nuts and screws, grounding kits, casters, levelers, and basic fan trays. These can add several hundred dollars per rack when purchased separately after the fact.
How to estimate your total rack budget step by step
A rack budget built on the frame price alone will be wrong. Here’s a repeatable method for getting to an accurate number before you commit.
- Count your U-space. Add up the rack units your current equipment occupies, then add 20%–30% for growth. That determines minimum rack height.
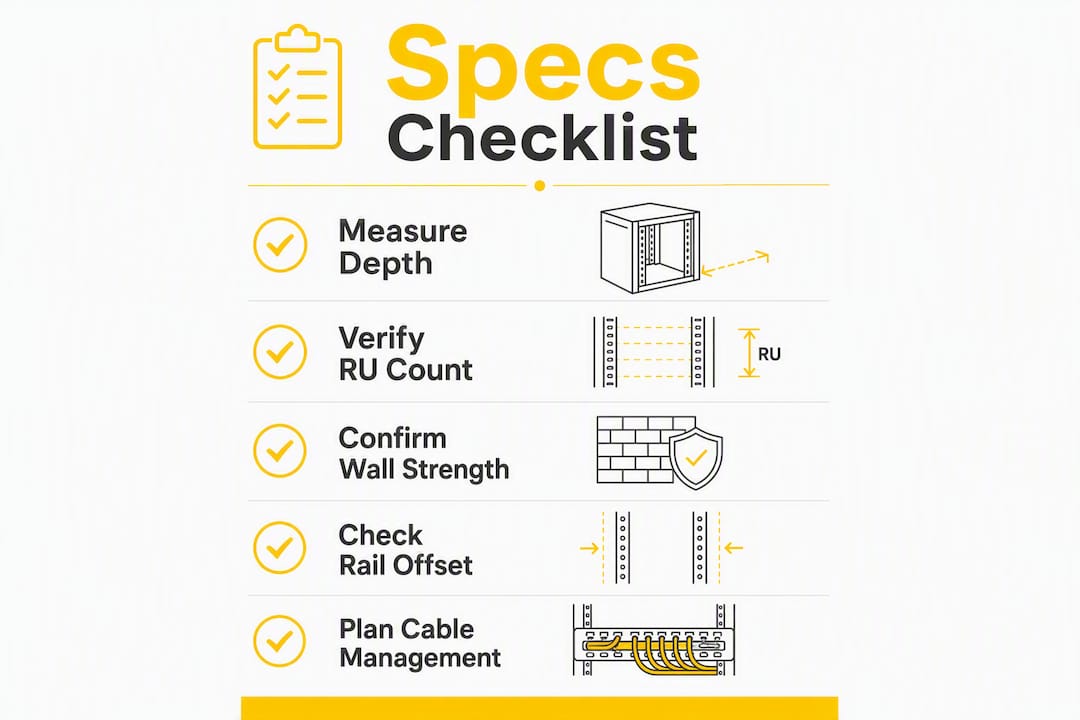
- Measure your deepest piece of equipment. Add 50mm–100mm for cable bend radius behind it. That’s your minimum rack depth.
- Calculate total power draw. Sum the power supplies across all equipment (watts). Size your PDU and UPS to 80% of their rated capacity to avoid overload.
- Check rail compatibility. Confirm that your server manufacturer’s rail kits fit the rack’s post spacing (typically 19" EIA-310 standard, but post depth and hole pattern vary).
- Assess cooling needs. Open-frame racks rely on room airflow. Enclosed cabinets need either active fan trays or a dedicated in-row cooling unit if heat density is high.
- Get a freight quote before ordering. A 42U cabinet weighs a few hundred pounds when empty. Freight on a large enclosure from a US distributor typically runs $100–$400 depending on distance and delivery type (liftgate vs. dock).
- Estimate installation labor. Labor typically accounts for 20%–40% of total costs on mid-range projects, with on-site assessment often assuming 2–4 technicians and several hours per rack. At standard US technician rates, budget $500–$1,500 for a single-rack install.
- Add a 10%–15% contingency. Unexpected site conditions, missing hardware, or a last-minute accessory always appear.
Example calculation for a mid-range 42U setup:
| Line Item | Estimated Cost |
|---|---|
| 42U enclosed cabinet (800mm depth) | $1,100 |
| Metered PDU (2U, 24-outlet) | $400–$500 |
| UPS (6 kVA rack-mount) | $1,500–$1,800 |
| Cable management (horizontal + vertical) | $200–$300 |
| Blanking panels (20 × $3) | $60 |
| Freight (liftgate delivery) | $200 |
| Installation labor (6 hours, 2 technicians) | $900 |
| Total | $6,498 |
That’s a real number for a production-ready single rack. The frame is $1,100 of a $6,498 project. The rest is ecosystem. This puts the frame at about 17% of total project cost, consistent with typical budgeting guidance.
New vs used server racks: when each one makes sense
Used racks can significantly reduce frame cost compared to new units. Corporate data center refresh cycles regularly flood the secondary market with tested enterprise 42U enclosures, making them attractive for home labs and budget-conscious SMBs. The supply is real and growing as organizations cycle through hardware faster than ever.
The savings are genuine. The risks are specific.
Risks to check before buying used:
- Structural damage: bent posts, cracked welds, or warped side panels compromise load capacity
- Missing hardware: cage nuts, casters, levelers, and blanking panels are frequently stripped out
- Paint corrosion or rust, especially on units that lived in humid or poorly ventilated spaces
- Unknown load history: a rack that held 2,000 lbs of gear for five years may have stressed welds invisibly
- No warranty or support: if a post fails after delivery, you own the problem
Inspection checklist for used racks:
- Verify all four posts are plumb and undamaged
- Check that the door hinges and locking mechanism work smoothly
- Confirm the rack’s rated static load capacity matches your equipment weight
- Count included hardware (cage nuts, screws, casters) and price out what’s missing
- Ask whether the unit was tested and cleaned before listing
Negotiation levers: Ask the seller to include transport to your loading dock, confirm the unit was tested under load, and request any spare hardware they pulled during decommission. Used server racks can significantly reduce setup costs, but only if you buy smart.
Pro Tip: The best value in used racks is a recent-vintage enterprise 42U enclosure from a data center refresh. These units are typically 2–5 years old, well-maintained, and sold in bulk. If you can arrange your own freight, you can capture significant savings vs. buying new, especially for a home lab or non-critical SMB deployment.
New racks make sense when you need a specific depth or finish that the used market can’t reliably supply, when compliance documentation requires a traceable warranty, or when the project timeline is too tight to wait for secondary-market availability.
Delivery, installation, and lead times: the costs buyers miss
The rack arrives at your loading dock. That’s not the end of the cost story.
Common logistics cost items:
- Freight surcharge for residential or non-dock delivery: $75–$200 extra
- Liftgate service (if no loading dock): $50–$150
- Stair carry or manual hoisting for upper-floor installs: $200–$500 per rack
- Crane or hoist for rooftop or data hall installs: $500–$2,000 depending on building access
- Packaging disposal (pallets, foam, cardboard): $50–$100 if the site doesn’t handle it
Installation costs vary by complexity and location, with higher costs typical for high-density or custom installs and in urban markets compared to rural areas.
Lead times: Standard racks from US distributors usually ship within a few business days; custom configurations may take several weeks to deliver. If your project has a hard go-live date, order the rack first and accessories second.
Site-prep checklist before delivery:
- Measure all doorways and hallways on the delivery path (a 42U cabinet is typically 24"–30" wide)
- Confirm elevator capacity if the rack goes above ground floor (most full cabinets weigh 150–300 lbs empty)
- Verify floor load rating for the installation location (a loaded 42U rack can exceed 2,500 lbs)
- Confirm dedicated circuits are in place before the rack arrives
- Arrange for packaging removal if the site doesn’t have a dumpster or loading dock
Missing any of these items on delivery day creates delays that cost money in technician standby time and rescheduling fees.
Three sample budgets for real buying scenarios
These budgets use conservative mid-range pricing and named assumptions. Adjust line items to your actual equipment density and site conditions.
Home lab (12U open-frame)
Assumptions: 3 servers, 1 switch, no compliance requirements, self-installed.
| Line Item | Cost |
|---|---|
| 12U open-frame 4-post rack | $150–$200 |
| Cable management (basic) | $60 |
| Freight | $80 |
| Total | $600 |
Frame = 28% of total. Accessories and freight = 72%.
Small office / SMB (24U enclosed cabinet)
Assumptions: 6 servers, 2 switches, 1 patch panel, basic UPS, self-installed with one contractor hour.
| Line Item | Cost |
|---|---|
| 24U enclosed cabinet (800mm) | $600 |
| Rail kits (6 × $100) | $600 |
| Metered PDU | $300 |
| UPS (3 kVA rack-mount) | $900 |
| Cable management | $150–$200 |
| Freight (liftgate) | $150–$200 |
| Contractor labor (2 hours) | $300 |
| Total | $3,000+ |
Frame = 21% of total. UPS and rails together account for nearly half the budget.
Single production rack (42U enclosed, fully equipped)
Assumptions: 10 servers, redundant PDUs, managed UPS, professional installation, compliance documentation required.
| Line Item | Cost |
|---|---|
| 42U enclosed cabinet (1,000mm) | $1,400–$1,600 |
| Rail kits (10 × $150) | $1,500 |
| Dual metered PDUs | $900 |
| UPS (10 kVA, rack-mount) | $2,000+ |
| Cable management (full) | $300–$400 |
| Environmental monitoring | $300 |
| Freight + liftgate | $300 |
| Professional installation (8 hours) | $1,200 |
| Contingency (10%) | $900–$1,000 |
| Total | $9,945 |
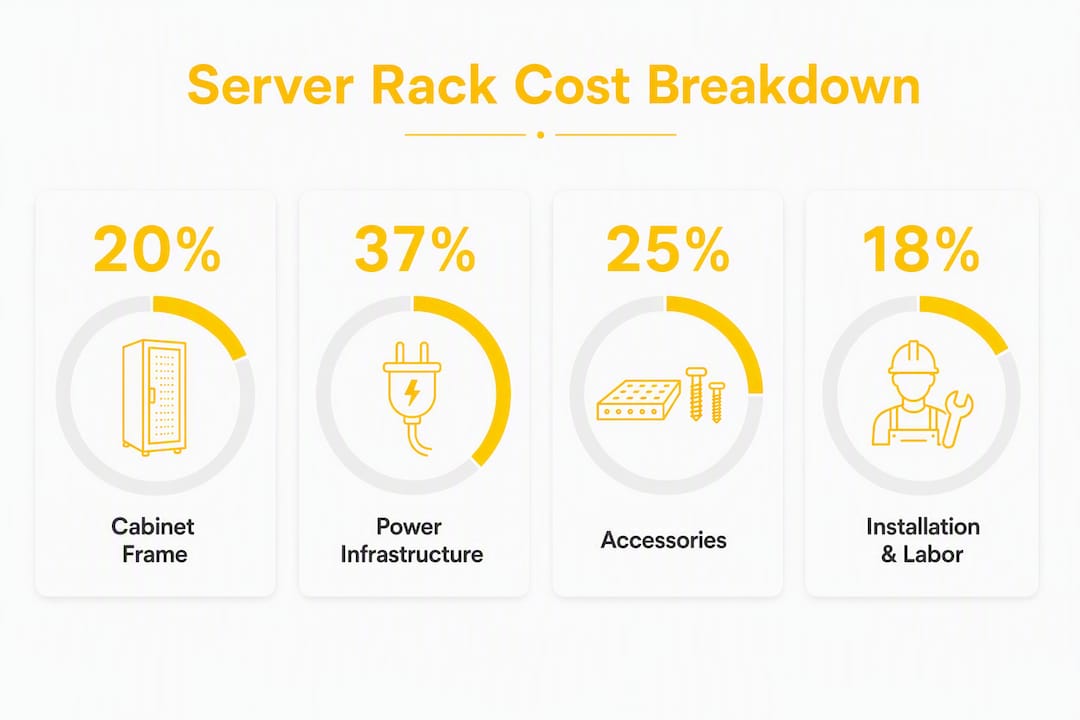
Frame = 16% of total. Power infrastructure (PDUs + UPS) alone is 37% of the project.
The consistent pattern across all three: the frame shrinks as a percentage of total cost as the deployment grows. For a production rack, you’re really buying a power and cooling ecosystem that happens to include a steel enclosure.
Practical tips to cut server rack costs without cutting corners
Most of the money wasted on rack purchases comes from two sources: buying more enclosure than the use case needs, and discovering missing accessories after delivery. Both are avoidable.
- Buy open-frame where security isn’t a requirement. A four-post open-frame rack at $200–$400 does the same structural job as a $1,200 enclosed cabinet in a locked server room. Save the enclosed cabinet for public-facing or multi-tenant spaces.
- Bundle accessories at purchase. Many US distributors offer PDU, rail, and cable management bundles at 10%–20% below individual pricing. Ask before you order.
- Check local stock before ordering. Shipping a 42U cabinet cross-country adds $200–$400 in freight. A distributor with a regional warehouse cuts that to $80–$150 and shortens lead time.
- Consider certified used 42U enclosures from recent refresh cycles. Enterprise-grade enclosures from 2–4 years ago are structurally sound and often available at 40%–70% of new cost. The secondary market supply is strongest in Q1 and Q3, when large enterprises typically complete infrastructure refreshes.
- Verify rail compatibility before purchase. Not all rail kits fit all racks. Confirm the rack’s post spacing, hole pattern (square, round, or threaded), and post depth against your server manufacturer’s rail specifications. A rail incompatibility discovered at installation costs a service call.
- Price out the full accessory list before committing to a rack brand. Some enclosure brands use proprietary accessories that cost significantly more than universal alternatives. A $200 savings on the frame can disappear in proprietary PDU brackets.
- Plan for growth at purchase. Buying a 42U when you currently need 24U costs $200–$400 more upfront and saves a full rack replacement in 18 months.
Pro Tip: Call the vendor’s sales line and ask specifically: “What cage nuts, screws, and casters are included?” Then ask: “What rail kits are compatible and are they in stock?” Those two questions surface the hidden costs that inflate final project spend more reliably than any other single check.
Key Takeaways
A server rack frame is typically 16%–21% of total project cost once accessories, power, and installation are included.
| Point | Details |
|---|---|
| Frame price range | Bare racks run $80–$600; fully enclosed 42U cabinets run $600–$4,000 depending on depth and features. Mid-range 42U setups typically cost $1,000–$2,000 including basic installation. |
| TCO multiplier | Accessories and installation commonly double or exceed the frame price, especially for production deployments. |
| Biggest cost driver | Power infrastructure (PDUs and UPS) accounts for up to 37% of a fully equipped single-rack project. |
| Used rack value | Certified used 42U enclosures from refresh cycles can cost 40%–70% less than new, with manageable risks if inspected properly. |
| Commsbuyer option | Commsbuyer stocks wall-mounted and free-standing 19" network cabinets with accessories, next-day delivery, and transparent trade pricing for volume buyers. |
The part of rack budgeting most guides skip
Most server rack cost guides stop at the frame price. That’s the wrong place to stop, and it’s why so many first-time buyers end up 60%–80% over their initial estimate by the time the rack is actually running.
The real planning unit isn’t the rack. It’s the rack slot: the combination of physical space, power capacity, cooling headroom, and cable infrastructure that makes a rack usable. A $600 frame in a room with no dedicated circuit, no cable management, and no UPS isn’t a $600 investment. It’s a $600 down payment on a $4,000–$6,000 project.
What I’d tell any IT buyer planning their first rack purchase: start with the power calculation, not the U-count. Figure out your total wattage, size the UPS and PDU to 80% of rated capacity, then work backward to the enclosure. The frame choice almost always follows naturally from the power and cooling constraints, not the other way around. Buyers who start with “I need a 42U rack” and work forward tend to underspecify power and overspecify the enclosure. Buyers who start with “I need to support X kilowatts reliably” tend to get the whole system right.
On timing: if budget is tight, Q1 is when the secondary market for enterprise 42U enclosures is most active. Large organizations close their fiscal years in December and decommission hardware in January and February. That’s when tested, recent-vintage enclosures appear at the best prices. If you can wait and arrange your own freight, the savings are real.
Commsbuyer: network cabinets with next-day stock and transparent pricing
Researching rack prices is one thing. Finding a supplier who publishes real pricing, ships fast, and doesn’t make you call for a quote is another. Commsbuyer stocks wall-mounted and free-standing 19" network cabinets alongside the accessories that actually complete a deployment: PDUs, fan trays, fixed and cantilever shelves, and patch cabling. Every product page carries a downloadable datasheet and pricing shown both ex-VAT and inc-VAT, so you’re not guessing at landed cost.
For volume buyers and trade accounts, Commsbuyer offers tiered pricing and project order support, which matters when you’re speccing multiple racks across a site. Stock is held locally in Ireland for next-day delivery, cutting the lead-time problem that makes large enclosures a scheduling headache elsewhere.
If you’re ready to check availability or get a trade quote, browse the full cabinet range at Commsbuyer and download the datasheets directly from the product pages.
Useful sources for price checking and specification lookup
These sources cover US-relevant pricing, rack specifications, and rack-and-stack cost guidance.
- Server Rack Cost Guide for U.S. Buyers: Table-backed price bands for standard 42U cabinets, open-frame racks, rails, and installation. Best for low/mid/high range validation and labor cost estimates.
- Data Center Rack and Stack Cost Guide (Digital Infotech): Installation cost ranges for standard and high-density rack deployments. Useful for budgeting labor and site-prep line items.
- How Much Does a Used Server Rack Cost? (DES3 Tech): Practical guidance on used rack pricing, inspection criteria, and where to source tested units. Best for buyers considering the secondary market.
- How Much Does a Server Rack Cost? (Cyfuture): Breakdown of cost drivers by material, enclosure type, and feature set. Good for understanding what moves a rack from low to high price.
- How Much Does a Rack in a Data Center Cost? (Cyfuture): Per-rack operational cost context including power, cooling, and annualized facility costs. Relevant for TCO planning beyond the hardware purchase.
- Penn Elcom US: 47U Server Enclosures: Live US pricing for a specific 47U enclosed cabinet with vented door and 10/32 rails. Useful for spot-checking mid-to-high range enclosed cabinet prices.
- Bud Industries Server Racks: US manufacturer offering standard and custom welded server racks with published pricing. Good for comparing domestic production options against import pricing.
- Commsbuyer: Network Cabinets and Accessories: Wall-mounted and free-standing 19" network cabinets, PDUs, fan trays, and shelves stocked in Ireland with next-day delivery and transparent trade pricing. For buyers who want commercial options with datasheets and volume ordering support.